Tramigo Asset Tracker
Quick Start Guide
Important notice
When charging the device: make sure you use the cable, charger and wall plug provided in the package. Cables, chargers or wall plugs that are not compatible with the device may affect charging.
- The device does not report: Make sure the device is charged and has a GPS connection and signal. If there is no GPS signal, the device will appear in the application marked grey.
- The device does not report as often as I would like: Reconfigure the device in the control center (scan the QR code for more details).
- The device is vibrating: the device’s battery is discharged and needs to be charged. You can also check the battery level via TramigoApp or TramigoCloud.
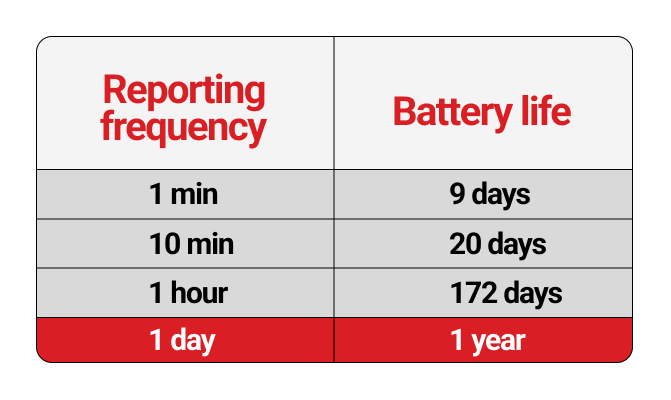
Battery Life
The battery life of the device will vary depending on the configuration set.
The table below provides examples of the battery life at different reporting settings.
Troubleshooting
- Track the location of your Tramigo Asset Tracker from the TramigoApp. The TramigoApp also offers other features such as motion detection, geofences and other alarms.
- Geofencing functionality allows you to be notified when a device leaves or enters a defined area.
Explanation of LED lights

Lights are flashing:
the device is searching for GSM and GPS signals

Lights are flashing when the device is on the charger:
the device is charging. As soon as the device is fully charged, lights will become constant

No lights when the button pressed:
the device is switched off / not charged
Lights appear only, when you press or hold the button:
the device is connected and working as it should
Reporting
By default, the device will report its position every 10 minutes, when the device is in motion, and every 24 hours when it is stationary. With this configuration the device’s battery can last up to 4 months without charging. It takes about 6-5 hours to charge the device.
By configuring your device’s reporting settings, you can influence the battery life of your device.
Configuration
1. The first step is to select the AT (Asset Tracker) device on which you want to change the report configuration frequency and click on the three dots.
(See the picture above)
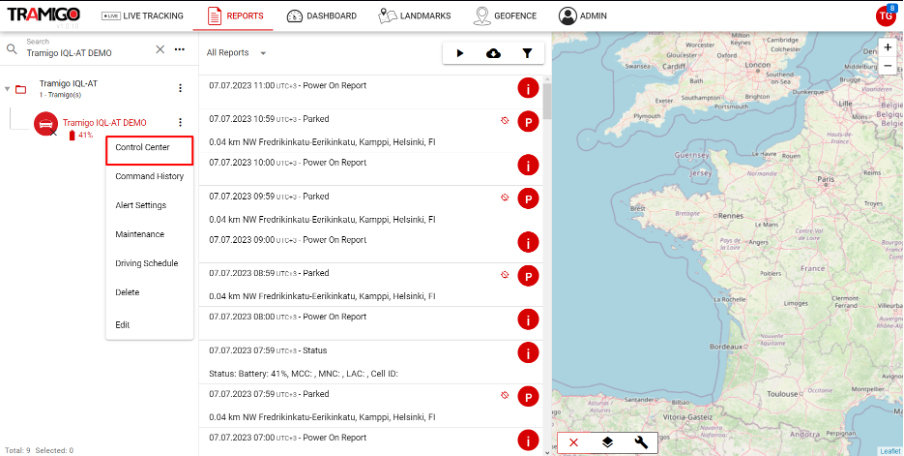
2. In the pop-up menu, select the “Control Center” option.

3. In the appeared panel only the top line parameters refer to the AT device (they are highlighted in the attached photo above).
The rest of the parameters are NOT related to AT and can be used only for Tramigo Vehicle Tracking devices.
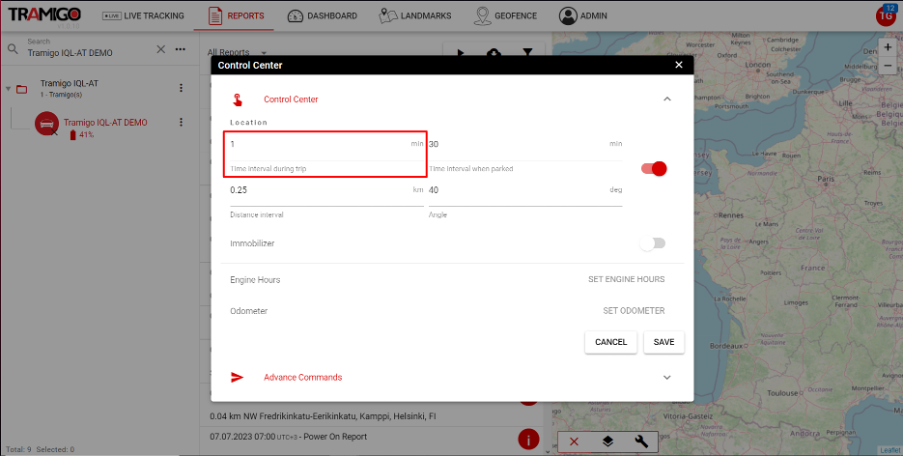
4. “Time interval during trip” – parameter that sets the frequency of sending reports when the device recognises motion status.
(It is measured in minutes and its value can be any value but not less than 1)
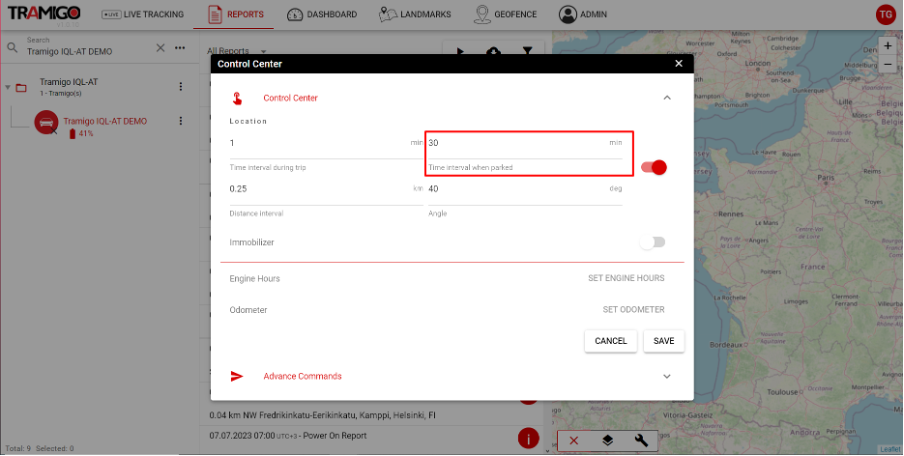
5. “Time interval when parked” – parameter that sets the frequency of sending reports when the device recognises non-motion status.
(It is measured in minutes and its value can be any value but not less than 1)
6. After setting the values, make sure that the slider is red as highlighted in the photo above. Then you need to confirm the values by clicking on the “Save” button.
Registration
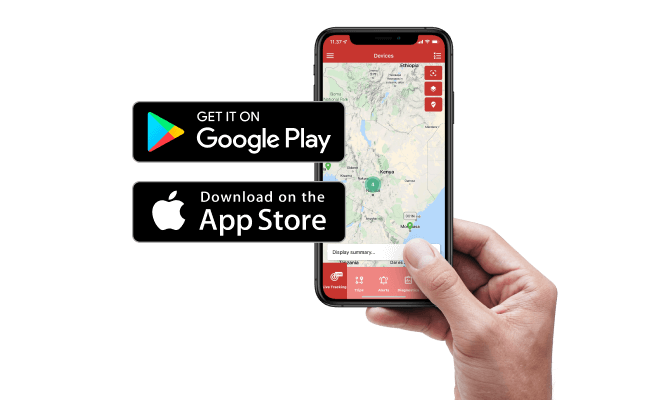
- Download the TramigoApp on your phone. Register and create your Tramigo account there. You can also login with the same credentials to TramigoCloud account. https://tramigocloud.com
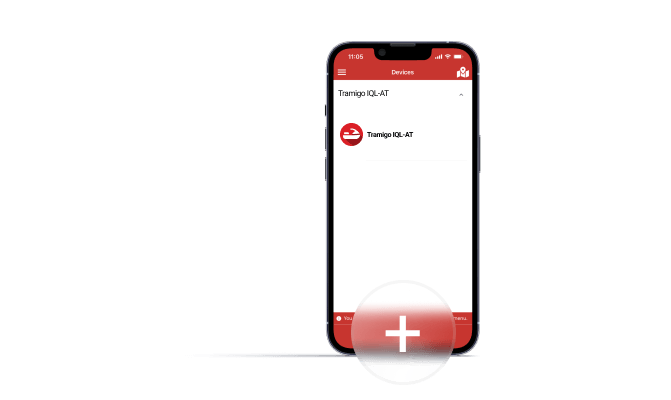
- With TramigoApp, you can add devices to your Tramigo account. Press the “+” button to start the process. Select “Tramigo IQL-AT” as your device type.
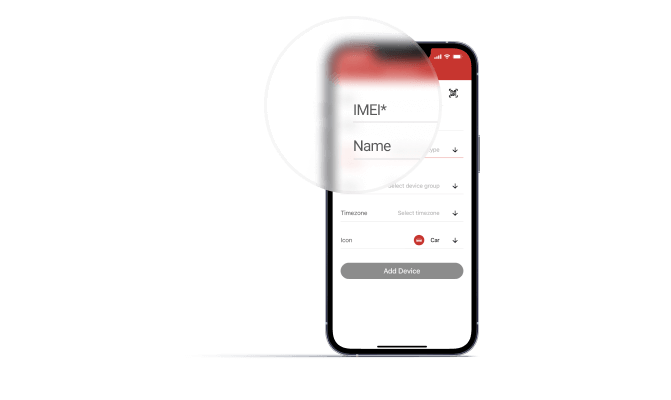
- Connect the Asset Tracker to your account by scanning the barcode (IMEl) on the side of the device in the TramigoApp or by entering the IMEI manually. You can give the device a name of your choice by entering it in the “name” field. Advanced settings allow you to define device groups, time zones and tracking icons in the tracking view.
Device set up
- Before using your device, make sure it is charged using a wireless charger.
If your device has a magnetic case on, remove it before charging. Place the device on the charger with the Tramigo logo facing up during charging.
The device’s LED lights (green and blue) will flash when the device is correctly placed on the charger and the device is charging.
- To check if your device is charged, press the on button for about 5 seconds until the device’s indicator lights start flashing. The flashing lights are a sign that the device is powered. You can check the exact battery level of your device in the TramigoApp.
If the indicator lights do not start flashing, it is a sign that the device is out of power.
It takes about 6-5 hours to fully charge the device. When the device is placed on the charger and both LED lights are on, it means that the battery is fully charged.
- Once you have added your device to your Tramigo account and charged its battery, your Tramigo Asset Tracker is ready to report. You can manage your reporting settings via the TramigoApp.
To establish the first GPS connection, we recommend taking your device outside to get a clear access to the sky.
GPS may work poorly in enclosed spaces, such as inside buildings.
TramigoCloud is a professional Web Fleet Management software for monitoring and managing larger numbers of devices.